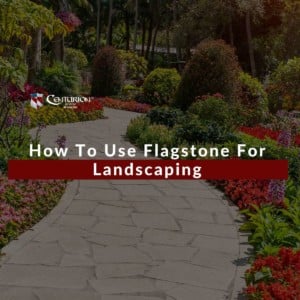
How To Use Flagstone For Landscaping
April 15, 2023
The Ultimate Guide To Using Flagstone For Landscaping Flagstone is a versatile material used in many landscaping projects, from patios…

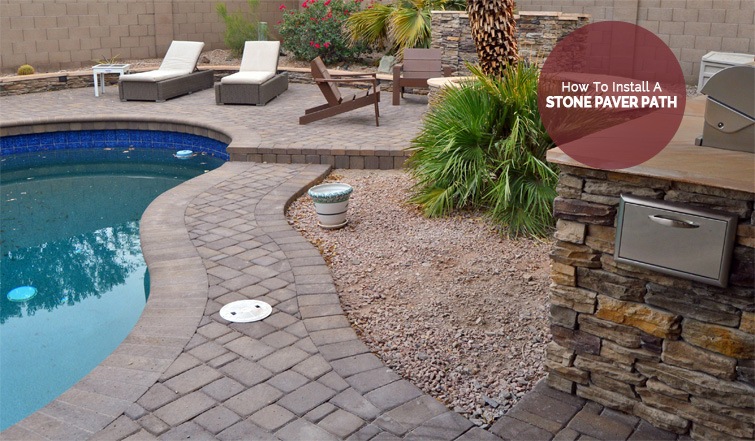
First, if you have an existing path in your yard, you need to remove it thoroughly before you add a new path in its place. Depending on the type of path you have installed, you might need to use a jackhammer. For protection from flying pieces of rocks, make sure that you wear goggles, or you could be badly injured. This is a relatively simple method, and your pathway will be removed in no time at all. Before moving on to the next step, make sure every single piece of the old pathway is gone and out of sight, or you could find yourself installing your paver sidewalk on loose bits of the former pathway.
The next thing you need to do is to create a defined edge for your paver path. This can easily be done using a hose if you don’t have any other materials. If you do, then you can use a simple string to line up your edge perfectly, as well as stakes embedded in the ground. In addition to creating these lines, you’ll need to make the edge much cleaner by removing any sod that may be overflowing and making the pathway less smooth and defined. Once this is done, you will be able to install the pathway cleanly and smoothly to give the paver path the defined lines you are trying to achieve.
Next, you’ll need to do some digging and replacing. Once the pathway is clear of your previous materials and the lines are straight, you will need to take about eight inches off the top soil so that when you lay the path down, it will be level. Once the eight inches are gone, lay about four inches of gravel, and two inches of sand on top of that. This will ensure a sturdy and thick foundation for your paver sidewalk. You don’t want the ground to be loose and unstable, making it susceptible to floods and other weathering damage it may sustain.

Next, you should always tamp it down or pack it in. This will keep the stone in place once you lay it down and will keep them from moving when you want them to keep still. If you neglect this step, then the stone or whatever material you decide to use will move and be dislodged over time, making your elegant pathway into a decrepit looking mess. You can either rent a tamper tool to do this, or make one of your own by nailing a flat piece of wood to a two by four and using that instead.
Following the tamping stage, you need to add concrete sand. This is not like ordinary sand, as it will lock into place and prevent unwanted movement and hold the pavers steady. You should tamp this down as well, just to be sure that your pavers won’t wiggle out of place.
 Next is the fun part. Picking your pavers is very important. You don’t want it to clash with the rest of your home and garden, and you certainly don’t want it to blend in. You want it to stand out just enough to add elegance and beauty to your home. The great thing about pavers is that they come in all kinds of different shapes, colors, sizes, and materials so you will always be able to find the right kind for your paver pathway or sidewalk.
Next, you need to lay the pavers out from a fixed, straight edge so that you have a definitive pattern to follow. It’s best to start near the foundation of your home or against the home. Follow a specific pattern and do not stray from it, or it can look random and look like a disaster. Uniformity is the key. And try not to worry too much about gaps, because there are still more steps to come.
Once your material is laid out, and everything is in its proper place, including bricks that have been cut to follow a curve, you need to fill the gaps between the bricks. To do this, you have to sweep dry sand across the top and into the joints and gaps to keep them in place. You can also use a plate compactor to tamp down the bricks and the surrounding sand, but you should only do this once, or damage could be done to your pavers. Once everything is set and in place, you can enjoy your stone paver pathway!
At Centurion Stone, we are Arizona’s largest stone supplier. You will always find exactly what you are looking for in our 10,000 square foot display area. Choose from Centurion stone veneers, flagstones, travertine, and more! For help with your stone paver pathway, get in touch with one of our consultants and we can help you with whatever project you wish to take up!
Published By:
MESA LOCATION
1608 N Greenfield Rd
Mesa, AZ 85205
Office: 480-654-2995
Email: [email protected]
Website: centurionstoneofaz.com
PRESCOTT LOCATION
8950 Long Mesa Drive
Prescott Valley, AZ 86314
Office: (928) 759-8543